The post Using Rappel Rings: Everything You Need To Know first appeared on Rappel World.
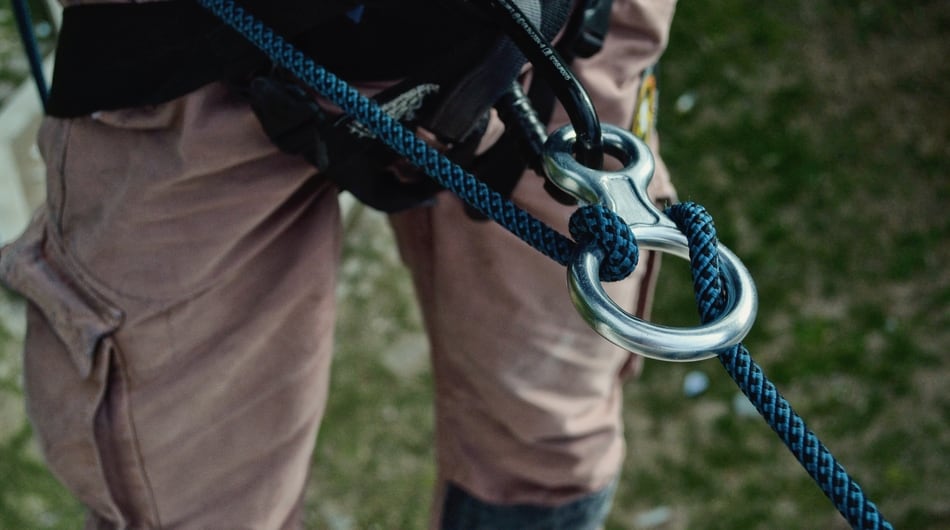
]]>Rappel rings are metal loops that are bolted in to a wall and allow you to lower yourself down a length of clip. They’re essential for anybody who wants to rappel in an area where it’s impossible to build or find an anchor.
The most commonly found rappel rings are often at your local climbing crag, where they can be found at the top of sport routes. Aside from rappelling down a route, the also allow you to build anchors, clip quick draws, and have your belayer lower you without needing to leave any gear. They’re not only found at crags, though; popular rappel locations, such as canyons or caves, will often also have rappel rings present.
In the guide below, I go over what rappel rings are and then talk about situations in which you should and should not use them. I then detail how to use them in various scenarios!
What Are Rappel Rings?
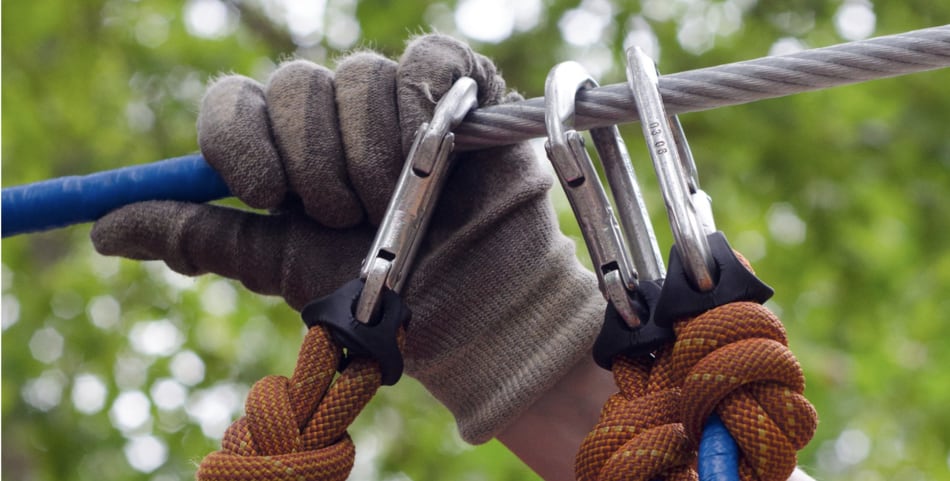
As I stated above, rappel rings are small, circular pieces of metal that are often attached to what’s know as a hangar. A hanger is a small piece of metal, bent at ninety degrees, with one end bolted in to the wall and the other end sticking out from the wall to allow you to clip in to.
With rappel rings, the metal loop is threaded through the open end of the hanger and then welded shut like so. This creates a rock-solid piece of protection for you to clip in to when climbing.
When Can You Use Rappel Rings?
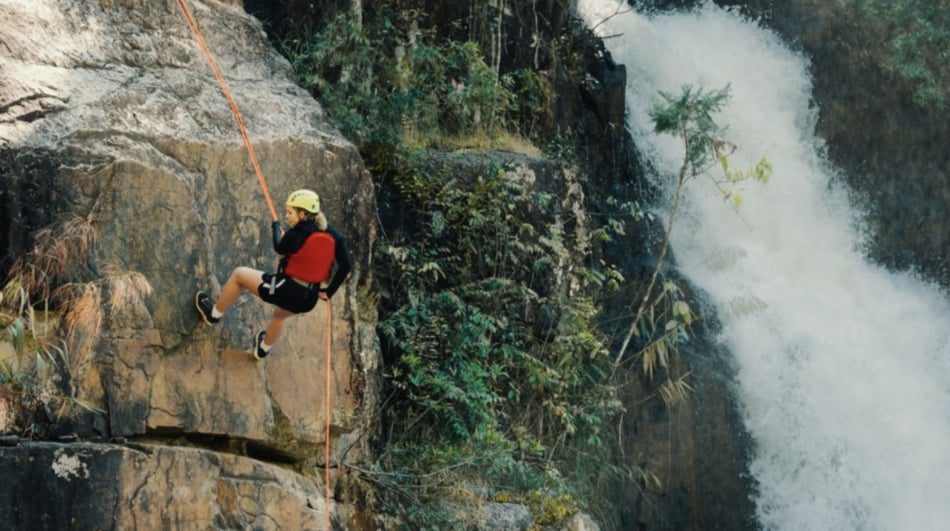
As I stated above, rappel rings are useful when you need to lower down a location in which you don’t have the ability to build an anchor. Because they’re drilled directly into the rock, rappel rings can be placed almost everywhere and used for a variety of activities, from rock climbing to caving to canyoneering. When in good condition (and you should always inspect them before use), the rings provide super secure protection for you to put your weight on.
There are three primary activities where you would use rappel rings: climbing, canyoneering, and caving. I’ve broke each of them down in greater detail below.
Climbing
As I said above, if you’re a climber, you likely already have some familiarity with rappel rings. Almost every sport route has a pair of rings at the top for you to clip in to once you’ve completed the climb. Some crags will even have a pair of rings located close to the ground, so you and your partner can practice certain techniques before heading up the rock.
In terms of climbing, rappel rings serve several functions such as:
Rappelling off of: I know this one is incredibly obvious, but it’s still worth mentioning. Rappelling is one of the easiest ways to get down a route, and it places the least amount of strain on your equipment. Most routes will have two rings hooked in to two separate hangers; thread your rope through both of them, make sure it’s equalize, and lower yourself safely to the ground. When you’re done, simply pull your rope down after you. It’s nice and easy, and you don’t have to worry about leaving any gear behind.
WARNING: As of recently, the American Alpine Club has actually started actively discouraging rappels. According to the ACC, a large portion of climbing accidents happen during rappelling. Because of this, for sport routes, the AAC now encourages being lowered by your partner.
Lowering: This is probably the most common use of rappelling rings when climbing. For single-pitch routes, the easiest way to get down is to simply have your belayer lower so that you don’t have to go through the process of setting up a rappel.
Rappel rings are handy for lowering because of how secure they are and how simple it is to set up. This is especially true when you don’t need to worry about cleaning the route; just clip a quick draw in to each rappel ring, put the rope through the quick draw, and get lowered off of those. Even if you have to clean the route, it’s a simple matter of clipping in to the rings with your PAS, untying yourself from the rope, threading it through the rings, and then tying yourself back in to be lowered.
The disadvantage of lowering is that it does place more friction on both your rope and your rappel rings, because the rope will slide through the rings while your weight is on it (instead of just sitting statically, like it does in a rappel).
Building Anchors: Sometimes when climbing, you want to try a route on top-rope or create a more secure anchor— say, to belay someone up a multi-pitch route. In these instances, rappel rings are super useful because they provide a bomber connection to the rock, meaning you have to worry far less about your anchor failing on you. Simply build your anchor as you normally would and then use the rappel rings to clip your anchor yourself to the wall.
One thing to note: if you want to belay someone up an outdoor route on top-rope, never simply thread your rope through the rappel rings and then belay them off of that. This places incredibly strain on the rings and can cause them to lose both their shape and their structural integrity. Instead, clip in to the rappel rings with a carabiner and use some webbing to create a sling with which you can belay from.
Canyoneering

Canyoneering, which is sometimes also called canyoning, is another activity where rappel rings play a large role.
Canyoneering often involves lowering yourself down steep sections of rock, too steep to down climb and too wet to safely navigate. Because of this, the ability to rappel is essential. Rappel rings allow you to this this in a more safe manner than, say, trying to build your own anchor; they also allow you to not have to leave any gear behind.
The main advantage of the rappel rings, aside from how secure they are to the rock, is that they wear far less on your rope than would be the case if you had to rappel off of a piece of webbing. Allowing the rope to slide against the smooth, metal sides of the rappel ring is far better than dragging it against a sling or similar piece of gear.
Rappel Rings also give you a secure place to anchor in if you’re on uncertain terrain and you want to rest without having to worry about falling. By using a sling or a PAS, you can anchor yourself to the rings and achieve a little peace of mind.
Pro Tip: When canyoneering, it’s always a good idea to bring a couple of screw-links, spare rappel rings, or similar bail carabiner with you just incase you come to an anchor and find that the rappel ring is worn down (later in this article, I’ll cover how to check if a rappel ring is safe to use or not). In such an instance, simply place your own gear on the same hanger as the rappel ring and use that as your point of connection. It’s better to leave a $10 carabiner behind than to have to worry about the safety of your rappel.
Caving
Similar to canyoneering, caving often involves lowering yourself down cliff faces where it would be impractical, or impossible, to build an anchor. Here, rappel rings become incredibly valuable pieces of equipment, as they allow you to safely navigate these obstacles.

The rings also serve another purpose, one that you won’t find as often when climbing or canyoneering: they allow you to leave as rope behind for you to ascend later using a jumar or similar device. This is extremely handy if you lower yourself down a cliff that you can’t climb back up; however, it does present it’s own unique set of considerations:
- Always make sure you have a rappel device capable of doubling as an ascender
- Be aware of the fact that other people might need to use the same rappel ring, so leaving a rope behind may not be appropriate
- When leaving a rope, it’s often tempting to simply tie in to one rappel ring and do a single-strand rappel. This means that you don’t have the backup safety of being clipped in to two rings. To fix this, you can always run a sling through your rope and connect it to the other rappel ring to serve as a backup.
When to Not Use Rappel Rings
Although rappel rings are extremely useful and can make your life a lot easier, you still need to approach them with caution before you use them. Unless you set the route you’re climbing by yourself, you will be relying on whoever it was who set up the rappel rings to anchor yourself to the wall. Most of the time, this is okay; most popular rappelling areas have climber’s associations, or some similar organization, that take care of the gear on the walls and ensure that it’s always in good shape.
However, even at your local crag, there can be hundreds (if not thousands) or pieces of hardware drilled in to the rock at any given time. Add on to this multi pitch routes, caving expeditions, and canyoneering locations, and it’s unreasonable to expect that anyone would be able to keep track of the quality of every piece of gear in a give area. Because of that, it’s essential to do your due diligence before you trust a rappel ring with your weight.
When examining a ring, there’s two things you want to look for to know if it’s safe: the quality of the rings itself, and the quality of its attachment to the rock. The first concerns the physical ring, while the other has to do with the hanger and bolt that secure it to the wall.
Checking the Rappel Ring
Checking your rappel ring is essential so that you can find out if it’s safe to put your bodyweight on or not. Thankfully, most of the checks you need to perform are simple visual ones, and can be done in a relatively quick period of time. That being said, always take your time and make sure to follow all of the steps.
Before trusting a rappel ring with your weight, look for:
- The overall quality of the ring. Here, you’re checking to see if environmental factors like water or rockfall have taken a toll on the rappel ring. Look for any rust that may indicate structural weakness, or any dents/chips in the metal that indicate it may have been damaged in the past. Either of these can be indications that the rappel ring is not at 100% strength.
- Check the inside of the ring for grooves. If they’re used over and over again in the same spot, rappel rings can actually developed grooves in the metal from the constant pressure of rope being run through them. These don’t always mean that the rappel ring is unsafe to use, but it’s definitely worth your time to spin the ring around so that you’re not putting your rope in the groove.
- Examine the quality of the weld. The weld is the most important part of the rappel ring, and it also happens to be the weakest. Make sure that it’s a solid weld, with no gaps or weaknesses. If, for some weird reason, you get to a rappel ring that hasn’t been welded shut, do not trust it with your weight.
- Check the inside of the ring for any burs. Sharp metal edges, also called burs, can sometimes develop on rappel rings if other climbers have caused metal-on-metal friction. These pose a danger to your climb, because they can both damage the integrity of the ring and may cut through the sheath of your rope.
- Test the overall shape of the ring. If the ring has been bent into an oval shape, this could mean that too much force has been applied at one point and damage has been done to the structural integrity of the ring.
Check the Bolt and Hanger
Even if a rappel ring is in perfect condition, it can still be completely unsafe to use if the anchor that holds it to the wall is weak. It’s essential to check these two pieces of gear to make sure they won’t come loose during your rappel. When examining a hanger and bolt, look out for the following things:
- Movement in the hanger. Your hanger should be as solid as the rock it’s attached to. If you can move it even just a little bit, this is a sign that it’s not secure enough and may come loose.
- Connection to the rock. Sometimes, bolts can come loose over time and start to slide away from the rock. This means that they’re not secure anymore and shouldn’t be trusted with your weight.
- Overall condition. As with the rappel rings, you want to be careful to check for rust, divots, or any other physical defects that could compromise the strength of the bolt or the hanger.
- Strength of the surrounding rock. Just like the rappel ring is only as strong as the hanger it is attached to, the hanger and bolt are only as strong as they rock they’re drilled in to. Always check the rock to make sure it’s solid enough to hold your weight.
How to Use Rappel Rings

Now that we know what rappel rings are and when it is/isn’t safe to use them, I’m going to break down how you can utilize them in a couple of different scenarios.
Climbing/Lowering
This will apply mostly for single pitch sport routes, when you’ve reached the top of your route and want to have your partner lower you down:
- Clip yourself into one of the rings using a PAS.
- Using a quick draw, connect yourself to the other rappel ring using a different link on the PAS. This backs up your anchor should one ring fail.
- Have your belayer give you some slack so you can test that your anchor is secure. If it holds, proceed with the next steps.
- Pull up some slack in the rope and tie an overhand knot.
- Clip that knot through a carabiner that’s attached to your harness. Now, the rope is attached to you through some means other than your figure-8.
- Untie the figure-8 knot from your harness.
- Thread the rope through both rappel rings.
- Re-tie yourself into the rope using a figure-8 knot.
- Unclip the rope from your harness, untie the overhand knot, and have your belayer pull in all the slack.
- Test the rope with your weight on it to ensure that it’s secure.
- If it is, proceed to unclip your PAS and quickdraw from the rappel rings. You are now suspended by the rope, which is threaded through the quick-draws, and are ready to be lowered by your partner.
Rappelling (Two Strand)
- Anchor yourself in to the rappel rings using a PAS, sling, or similar device.
- Ensure the rope is secured to your harness using an overhand knot clipped through a carabiner, or some similar technique.
- Thread one end of the rope through the rappel rings and tie a stopper knot.
- Locate the other end of the rope and tie a second stopper knot.
- Begin to pull the rope through the rappel rings until you locate the halfway point on the rope. Ropes usually come with the half-way pre-marked; if not, you should mark it in advance of your rappel.
- Connect your rappel device to the rope and then secure it to your harness.
- If using an ATC or other non-locking device, back up the rappel with a prussik or similar knot.
- Once the rope is securely through your device, untie the overhand knot and let the rope drop.
- If possible, do a visual check to ensure that both ends of the rope are on the ground.
- Un-anchor yourself and proceed to rappel.
Rappel (One Strand)
- Anchor yourself to the rappel rings.
- Connect one side of the rope to the rappel rings using your preferred knot. If you only tie it to one rappel ring, consider backing it up on the other ring.
- Tie a stopper knot on the other end of the rope.
- Lower the rope.
- Connect your rappel device to the rope.
- Un-anchor yourself and proceed to rappel.
The post Using Rappel Rings: Everything You Need To Know first appeared on Rappel World.
]]>The post Buying Rappel Gear: 8 Handy Tips first appeared on Rappel World.
]]>My top eight tips for buying rappel gear are:
- Educate yourself
- Research before you buy
- Explore used equipment
- Go to a store with a good return policy
- Only use trusted brands
- It’s worth spending for your gear to last longer
- Know when it’s time to replace your gear
- If required, buy gear that’s activity-specific
These tips are designed to ensure that you make educated, well-informed decisions when buying gear. The purchase of gear is so important because it ensures your safety when you go out; by buying high quality brands and knowing what you need, you can minimize the chances that you get in to an accident when rappelling. Some of the tips are pretty self explanatory, but read below if you want to expand on them!
1. Educate Yourself First
One of the most important things before you walk into a store or log on to a website is to make sure you know what you’re shopping for. When I was buying my first set of climbing/rappelling gear, I walked in completed unprepared with basically no idea of what I was looking for. To a beginner, gear stores can be super disorienting: they’re jam-packed with confusing looking equipment and product descriptions that just don’t make sense.
Because of this, it’s essential that you educate yourself before you head out. Some resources I would recommend using:
- Online sites such as Mountain Project or their forums
- Climbing.com— great source for all kinds of articles, from beginner posts to handy tips.
- Books such as Mountaineering— The Freedom of the Hills can have entire chapters on rappelling
- Youtube videos provide great tutorials and can be handy for visual learners
- This site and others such as Don’tDieRappelling and Rockulus have lots of great information on them
You want to learn enough so that when you go shopping, you have the ability to make educated decisions. Cover the basics concerning what rappelling is, what dangers it presents, and what gear you need to mitigate those dangers.
Another really helpful source of information can be the people who work at the stores. Employees of outdoor brands usually tend to enjoy the outdoors too, and they’ll sometimes have year’s of personal experience that they can draw on to help you. Just a quick heads up, though: learn to differentiate between the information and opinions that employees will give you. Information you should listen to; opinions can be weighed, but shouldn’t be fully relied on.
2. Research Brands Online
Aside from just getting the basic information, you’ll want to know a little bit more about what you’re buying before you chose to commit hundreds of dollars.
Product review sections on Amazon are a great way to read what other people are saying about the gear you want to buy. Sometimes they can act as a really good red flag if a piece of gear is poorly designed or dangerous. I would say this is pretty rare, though, because most outdoor companies put their products through rigorous testing before they release it on the market.
More often, these sites are really good for finding the personal preferences of people who have purchased the gear. Say, for example, you’ve got your eye on a helmet, but your head tends to be in the smaller range. If you read a bunch of reviews online saying how the helmet fits large, you can save yourself the time of having to drive to the store and try it on.
There are also a few really good websites like Outdoor Gear Lab that provide not only in-depth reviews, but also product comparisons and recommendations. Using these can give you a more holistic view of what your options are for any given piece of equipment, and can help you make an informed decision based on personal preferences.
3. Look at Buying Used
Now, this one is a little bit more specific, because I only recommend it for specific pieces of gear.
The general rule I use is this: if your like is going to depend on something, DO NOT BUY IT USED. That means rope, harness, helmet…. put forwards the extra money and buy it from the store. Make sure the packaging is still on it. Trace it back to the warehouse, if you must (I’m kidding, but you get the sentiment).
The problem with buying used gear is you can never quite be sure what it’s been through in its previous ownership. A rope may look perfectly fine on the outside, but if someone’s been using it for years, the interior core could be damaged beyond repair. Harnesses are the same way. When it comes to safety, it’s just not worth taking the risk.
That being said, there are some pieces of gear where buying used can save you a lot of money. For example, clothes and backpacks can often be found online at heavily discounted prices and still be in excellent working condition. If you have a piece of gear in mind that you want to buy, consider doing a quick search to see if you can get it used.
So where do you find these hidden gems? Online classifieds like Craigslist or Kijiji are excellent sources. Facebook will also often have local buy-or-swap groups that can be climbing-focussed; spending enough time in these will turn up some sweet deals for rappelling gear. Finally, some stores like MEC or REI often do garage-sale events where people bring their old gear in and offer it at discounted prices.
4. Go to a Store With a Good Return Policy
One of the things about outdoor gear is that you often don’t know how something is going to perform until you get to see it in action. Just recently, I returned a pair of climbing shoes because they were way too tight on my toes, and I was able to get a full refund despite the fact that I had used them a couple of times.
Both MEC and REI, two of the most popular outdoors outlets, have rock-solid return policies that allow you to bring your gear into the field and use it before making a final decision. This allows you to see how your stuff will perform under real conditions.
Picture this: you go in to a store, try on a harness, and then decide it’s comfortable. After using it on a couple of rappels, however, you discover that when hanging from the harness— a position you didn’t have the opportunity to try while in store— one of the buckles digs in to your leg. If you don’t watch the return policy, you might be stuck with a piece of gear that’s uncomfortable and difficult to use.
Just a heads up about this tip and the one above: if you buy used gear, even from an accredited retailers, they usually have a no-returns policy. That’s another reason why I wouldn’t recommend buying any of your essential gear while used.
5. Use Only Trusted Manufacturers
This follows the same line of logic as my recommendation for buying all of your safety gear new: your life isn’t worth saving a few dollars.
Look, I get it. Climbing gear is expensive. Like, insultingly expensive. Do I feel like I’m getting ripped off when I pay $300 for a rope? Yeah, I do. I feel like I’m being scammed.
The thing is, I’m not. Climbing gear is expensive because of the extreme lengths that manufacturers go to make sure their gear is safe. This includes years of r&d, scrutinizing quality control tests, and rigorous testing to meet the requirements set by both their internal guidelines and external safety regulations. Meeting these requirements inflates the cost for a company, and that’s why they need to charge you so much.
There’s a lot of shady websites out there who promise to get you gear for lower prices, be it a harness or a rappel device. I can’t stress enough how bad of an idea it is to order your stuff from a website that you’re not familiar with. Sure, it may be cheaper, but you have no idea what kind of safety tests have been done on the gear, or what kind of corners they may be cutting so that they can provide it at such a reduced price.
So, what brands can you trust? Here are a list of my personal favourites for buying rappelling gear from:
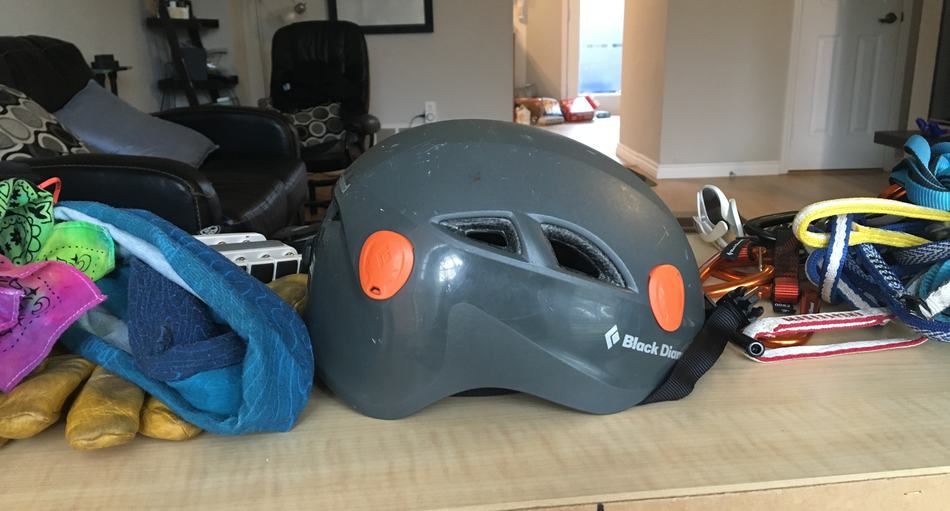
- Black Diamond
- Petzl
- La Sportiva
- Arcteryx
- Metolius
- Mammut
Those are the big-name manufacturers who have year’s of experience producing high-quality gear. However, as I stated above, don’t just take my word for it; do independent research before you buy and see what other people are saying.
Just because a piece of gear didn’t make the above list doesn’t necessarily mean that it’s going to be bad. In general, if a trusted retailer— like MEC, REI, Atmosphere, or any of the other large stores— carries the gear, it’s safe to assume that you can use it. If you’re ever unsure, reach out for expert advice.
6. Spend a Little Extra, Use a Little Longer
This relates to what I was saying above in terms of paying for the quality. As I stated, it has important implications in terms of longevity, but it can also matter for how long you plan to hold on to the gear.
The fact of the matter is, rappelling gear gets worn down fairly quickly. I know personal, I demand a lot of my tools; I use them in some pretty extreme environments, and I put them through some pretty rigorous conditions. Using gear like that can wear it down fairly quickly, so the replacement life for rappelling gear tends to be fairly short.
In that light, it makes sense to splurge a little extra and get something that’s truly high quality. When you find a piece of gear that you really like, you don’t want to have to worry about replacing it in eight month’s time— especially in a modern retail environment where product lines tend to be foreshortened. Paying a little extra up front may seem tough when you’re at the store, but I promise that it can save you in the long run.
Another good benefit to this is that it’s more environmental! The more often you replace your gear, the more frequently you’re creating waste. By hanging on to stuff longer, you’re helping to keep materials out of landfill.
7. Know When It’s Time To Replace
This tip might seem contradictory to the one above, but they actually go hand in hand.
Once of the hardest decisions to make for your climbing gear is knowing when to replace it. You’re constantly walking a fine line between not prematurely jumping the gun and spending unnecessarily money, and potentially heading out into the wilderness with an unsafe piece of gear (which you want to avoid at all costs).
There are some general rules to follow that can tell you when it’s time to replace something. I don’t have time to cover all of them here, but some of the more common ones:
- Helmets are only rated for one large impact. If you ever hit your head and think to yourself ‘Gee, that could have been bad if I wasn’t wearing a helmet’— time to get a replacement.
- If you ever take a factor two fall, immediately retire every piece of gear involved.
- Check your rope at the beginning of each season for core shots, sheath separations, or any tears that expose the inner section.
- If the webbing on your harness is frayed, it’s time to start shopping for a new one.
The above rules are just general tips; make sure you do your own research and educate yourself before you commit to a piece of gear. Some manufacturers, like Petzl, are making life easier for everyone by including visible wear indicators on their gear— strips of red that show once a piece of webbing is too worn out to be safe. Don’t count on this, though; you should always know enough to make a judgement call by yourself, without any outside influence.
8. Know What You’re Buying For
Different activities require different types of gear, and if you’re not sure what you’re going to be using it for, you can end up spending a lot of money for the wrong stuff.
This post is about rappelling, but even that itself is a fairly broad category. You need to know the specifics. Are you waterfall rappelling? Are you caving? Does your rope need to be dry treated? Do you want a rappel device that can second as an ascender? How long do you need to carry the gear for? How important is weight?
Answering all of those questions is an important step before you head out to the store. If you have a specific activity in mind— say, waterfall rappelling— then you should know the specific gear you’ll need for that activity, like a waterproof pack and a dry treated rope.
At the same time, though, you don’t necessarily need to have all of the answers. A lot of gear will function perfectly well in a more general role; if you’re just getting in to rappelling and you want to explore your options, it’s okay to just buy generalist gear and learn as you go. So, don’t be scared if you’re a beginner and don’t have all of the answers. If you’ve got something specific in mind, however, it’s important to know which pieces of gear will and won’t work for that activity.
A few general rules:
- If you’re going to be around waterfalls, prepare for the fact that all of your gear is going to get soaked (and this might make it less safe, depending on what gear it is)
- Similar to above, any gear that you want to use in winter should be water-resistant
- If you’re going caving, your belay device should work as an ascender and a descender
- If you’re rappelling to lower yourself from a climb, bring a device that can perform dual-rope rappels so that you don’t have to leave any gear behind
So there you go! Those are my tips on buying gear for rappelling.
The post Buying Rappel Gear: 8 Handy Tips first appeared on Rappel World.
]]>The post What to Wear While Rappelling first appeared on Rappel World.
]]>So, what do you want to wear on your rappels? The exact choices may change depending on the circumstances of your rappel, but loose-fitting articles of clothing that allow for lots of mobility usually makes for the best choices.
Dangling from a harness for extended periods of time can be uncomfortable enough without your clothes furthering the discomfort. By making the right choice when deciding what to wear, you can ensure that you get to enjoy your rappel and mitigate any injuries like rashes, sunburn, etc. Loose fitting clothing will make it easier for your harness to sit naturally, while mobility is important so that you can safely perform all the steps in your rappel.
Just a heads up: if your clothing is too loose-fitting, if may start getting in the way and get tangled in your rope. Try to avoid anything that’s so loose-fitting it may be considered baggy.
Shirts

When rappelling, your shirt can have two purposes (aside from keeping you decent): protecting you from the sun and stopping the harness from rubbing against your waist.
For protecting you against the sun, it’s up to personal preference if you want to wear a long sleeve or short sleeve shirt. Long sleeve will obviously make it easier to shield your arms, but you run the risk of overheating. T-shirts, by contrast, will keep you cool, but you may need to invest in some sunscreen if you burn easily.
Some clothes nowadays also come with SPF protection, which can be extra handy for shielding your skin.
For stopping the harness from rubbing against your waist, the most important thing is the length of the shirt. It should be long enough so that you can tuck it either a) into your shirt or b) underneath the belt of your harness, without having it pull loose when you move. This prevents you from developing a painful rash when the webbing of your harness rubs against exposed skin.
Rappelling isn’t the most exhausting thing on the planet, but it still counts as physical exercise. Because of that, it might be wise to avoid heavier materials such as cotton in exchange for something lighter. Outdoor clothing companies make a lot of money selling breathable, moisture-wicking shirts advertised for climbing and hiking. While these shirts will work for rappelling, they may not be worth the money; off-brand exercise clothes from a store like Winners can function just as well and save you a lot.
Note: When it’s extra hot outside, some people (myself included) may want to rappel shirtless (or in a sports bra, for the ladies). This is perfectly fine, as long as you’re aware that you won’t have protection from the sun, your waist might get chaffed, and you’re a little more prone to cuts and bruises if you bump in to the rock.
Sweaters/Jackets

For colder days, a sweater or jacket can be essential. These can usually slip on over your harness and keep you warm/dry when you’re suspended mid-air. Aside from just comfort, being warm can bring with it safety concerns as well. Cold, shivering and wet are not the type of conditions you want to be in when you’re doing through important safety procedures. Protecting you from the elements gives your mind more capacity to focus on what’s important— and because of that, coming prepared with a sweater or jacket is essential.
For this category, I would actually recommend the opposite in terms of length than what I said for a t-shirt. Shirts are often thin enough to tuck underneath your harness, while jackets can be bulkier and more difficult to manage. Because of this, bomber-style jacket— or any other style that’s shorter around the waist— will stop the hem from getting in the way of your rope and gear clips, while still keeping you warm.
Taking clothing on and off mid-rappel can be a massive pain (not to mention very dangerous). Because of this, it’s good to have a jacket with some kind of breathability or flaps that you can open should you start to overheat.
So, what type of sweater/jacket should you wear? Rain coats/windbreakers are always a good choice. They’re water and win proof, they pack small, and they often have back or armpit vents that can help you stay cool. When it comes to insulating from the cold, however, they can lack in effectiveness compared to something bulkier.
For summer months in warm climates, I would definitely say go with a rain jacket. When the weather starts to cool down, however, you may need something more substantial. Wool is an excellent choice for combining warmth with water-repellant features. It won’t stay 100% waterproof, but a good wool sweater— especially one that’s treated to wick moisture— can certainly hold its own against a light rain or mist.
Of course, if you’re really worried about the weather, layering up is always a good option. Pair a rain jacket with a nice fleece sweater to truly ensue that you’re insulated.
Pants/Shorts

The choice between pants and shorts is going to come down to a matter of preference and weather conditions.
Personally, I prefer pants. I find that they protect my legs better, and they don’t get as bunched-up as shorts do when I’m wearing a harness. A lot of people like to wear shorts, however, because of the increased breathability that they offer.
There is a hybrid choice in the form of zip-off pants, which provide the best of both worlds. For those of you who don’t know, these are a pair of pants with a zipped seam that allow you to remove the lower half of the legs and convert them in to a short. They’re great for when you’re in a situation with fluctuating temperatures and you can’t be bothered to carry around a spare pair of shorts and commit the time to change in to them.
I strongly, strongly recommend against trying to remove your pant legs mid-rappel. This can lead to a whole host of dangerous situations, and it’s really not worth the marginal change in temperature.
If you’re conducting a series of rappels, however, where you’re going to have time between to rest on solid ground, this can be a great option to avoid overheating. Another area where these can be useful is if you have a long approach to your rappel. Zip off the pants on the approach to stay cool while hiking, and then put them back on so that your legs stay protected when you’re rappelling.
In terms of material, this is one area where I think it’s appropriate to go out and buy a pair of climbing or hiking-specific pants. These are designed to be durable yet breathable, and comfortable when wearing a harness. Loose-fitting pants like tracksuits or sweats are a little too flexible and can move around a lot underneath your harness, while jeans tend to be stiff and inflexible. A good pair of hiking pants, however, are sturdy enough to maintain their shape while not being quite as unforgiving as jeans.
Shoes

This is an important one, because your feet can be essential to help you control yourself against whatever wall you’re rappelling down.
There’s a few things you want to consider when selecting a pair of shoes:
- Grip: The bottom of your soles have to have a sufficient grip to help you find control on whatever you’re rappelling down. The sole of the shoe should also be thick enough to protect your feet from sharp rocks and other hazards. In terms of grip, textured rubber found on hiking shoes or approach shoes is often the best alternative.
- Weight: Holding your legs up in a parallel position while rappelling can become tiring over extended periods of time. It becomes even more tiring if your feet are cased in a heavy pair of boots. A standard saying in hiking is ‘a pound on the foot is worth three on the back’. Put simply, this means that your body expends a lot of energy trying to keep your feet up, so there’s no point in making them work harder than necessary.
- Protection: Closed toes are a necessity when you’re rappelling. Sandals definitely have their place in the world, but working with hard stone and rockfall hazard is not the place for them. Make sure that your toes are sufficiently protected from getting crushed by investing in a good pair of shoes.
Based on the above criteria, a pair of hiking shoes, approach shoes, or trail runners are best to wear when rappelling. If you don’t want to have to splurge on a new pair, everyday runners will do just fine.
Rain Gear

I talked about rain jackets above, but its worth touching on it again here. There’s few things in this world less fun than getting caught in the rain when you’re dangling seventy feet up from a piece of rope (I should know— I’ve been there). This isn’t just uncomfortable; it’s also dangerous, because when you’re wet an uncomfortable, you’re more prone to rush and make a mistake. Because of this, it’s essential to come prepared with the appropriate gear.
Always check the forecast beforehand so you know what you need to bring to your rappel. If it’s calling for rain, make sure you pack your jacket, along with a pair of rain pants if you think it will be necessary.
Similar to rain jackets, rain pants are made of waterproof material and are designed to pull over what you’re already wearing so help and keep you dry. They have some obvious benefits, but they also come with the drawback of making your harness less comfortable and making it harder for your legs to breath. If left on in warm temperatures, they can quickly cause overheating.
Accessories
Aside from the main articles of clothing, there are a few other things you might want to consider wearing when you rappel:
Hats
Hats are great for increasing visibility and helping to keep the sun off of your face/neck. They can also prevent rain from getting in your eyes. I would highly recommend bringing a hat with you no matter what the weather conditions are.
The type of hat you want to wear comes down to personal preference. Wide-brimmed hats are more adept at keeping sun off the back of your neck, but they’re also harder to pack down, and if you’re wearing a backpack they can sometimes interfere with the brim. Baseball caps solve this problem, although they’re not as protective.
Another thing to consider is how secure your hat is on your head. Rappelling can expose you to some pretty strong winds, and you don’t want your favourite hat blowing away.
Sunglasses
Similar to above, sunglasses are important for ensuring good visibility when rappelling, which can affect safety and comfort. Same as the hats, you need to be aware that you’re at risk of dropping your sunglasses— investing in a band to keep it on your head can certainly be a good idea.
In terms of sunglass quality, it’s definitely going the extra mile to invest in a polarized pair. Some mountaineering companies offer wrap-around designs that protect you from all angles, but I personally don’t believe these are necessary.
Gloves
Rappelling gloves are a key piece of gear if you want to prevent painful blisters from occurring during long rappels. You can chose from several options, including fingered or fingerless gloves; the most important thing is that you find a pair that works for you.
If you don’t have a pair of rappel/belay gloves, it’s easy to substitute them for something less specialized. Everyday gardening gloves, especially ones made from some kind of buckskin, will perform perfectly well.
Socks
A good pair of socks can go a long way in helping your feet stay dry and comfy. The right socks can also turn an uncomfortable pair of shoes into something tolerable.
Wool socks are usually preferred because of their moisture-absorbing ability and breathability.
Packs
If you’re bringing lots of gear, having a pack to carry it all in is definitely a good thing. I wrote an article on rappelling with a backpack, so it’s worth a read to make sure you’re following all the appropriate safety steps.
When selecting a bag, look for something close-fitting, with enough straps that you can adjust it for comfort and hold it tight to your body. You don’t want your bag to be dangling around, because this is far less comfortable and will make it harder to prevent your gear from getting banged up. Climbing specific packs like the Mountain Hardwear MultiPitch will work the best, but anything with a chest and waist strap should perform just fine.
Sunscreen/Bug Spray
Sunscreen and bug spray can really increase the safety of your rappel, so it’s definitely worth bringing them along. A few things to consider:
- Waterproof sunscreen can help prevent you from sweating it off, or losing your protection if you go near a waterfall.
- Be careful bringing your sunscreen around your rope!! DEET is a damaging chemical, and exposing it to your gear can compromise the integrity of the equipment. When applying it, make sure to stand as far away from your rope as possible to prevent any contact.
Knee/Shoulder/Elbow Pads
These are less common, but they’re still useful so it’s worth a mention. If you’re trying to navigate through tricky terrain— say, a wet ledge in the middle of a canyon— you might want some additional protection for your body. Knee pads can be a lifesaver against hard rock, and they’re pretty commonly found in caving expeditions or canyoneering trips. You can buy climbing-specific gear or go with something more common, like volleyball pads.
Situational Awareness

I’ve tried to keep this list as broad as possible, because the situation in which you’re going to rappel will always differ. However, there are two explicit scenarios that I want to mention that will cause you to heavily modify what you’re wearing:
Waterfall Rappelling
When waterfall rappelling, everything becomes about dealing with moisture. Your clothes should be quick-dry and breathable. Your shoes should be lightweight and, if possible, water supportive— close-toed sandals are ideal.
In some cases, it may be worth investing in a wetsuit (if the water is going to be cold) or bringing a spare pair of clothes (if you have a long hike out— nothing is as demoralizing as needing to trek long distances in soggy clothes).
Cold Weather
Cold weather brings its own hosts of problems. Here, make sure to swap your baseball cap for a toque, ditch the shorts, and throw an extra layer in your bag.
The biggest change you’re going to need to make is gloves. It’s essential that you keep your hands warm while rappelling, so you can retain control of the rope and deal with all the gear that’s necessary. If need be, bring two pairs of gloves— one smaller one for working with knots and carabiners, one bulkier pair of mitts to keep your hands warm when sitting around.
Conclusion
So there you go! That’s my guide on what to wear while rappelling. If you have any thoughts please don’t be afraid to leave a comment below, and feel free to shoot me an email if you have any questions.
The post What to Wear While Rappelling first appeared on Rappel World.
]]>The post How To Rappel While Wearing a Backpack first appeared on Rappel World.
]]>So how do you rappel with a backpack? While rappelling with a backpack, you can either wear it normally around your shoulders, or attach it via a tandem rappel. Which option you chose will depend on the weight of the bag.
Most of the time, rappelling with a backpack can be performed just as a normal rappel. However, you do need to consider how bulky the bag is before you commit to simply wearing it as you usually would. If you have too much gear, the pack can throw off your balance and compromise the safety of your rappel. In these instances, it can become necessary to attach the bag to your harness via a tandem line so that it doesn’t affect your centre of gravity.
Both of these techniques are important to know; I’ve compiled a quick guide below that walks through the entire process.
What’s The Problem When Rappelling With a Backpack?
As I mentioned above, the main danger in rappelling with a backpack is how it will affect your weight on the rappel. To understand why, it’s first important to understand what’s going on in terms of physics while you’re abseiling.
In most instances, a person who’s rappelling will be wearing a harness attached to their waist/legs to help them stay connected to the ropes. These harnesses are great in a lot of ways: they’re affordable, portable, and they allow you to comfortably ‘sit’ while rappelling.
They do, however, have on element that makes it difficult to rappel while carrying a load: your attachment point to the rope is located at your waist. For most people, the upper body is already heavier than the legs; this makes them top-heavy when rappelling.
Proper rappelling technique and the shape of your harness usually work together to combat this effect and keep you right-side-up during your rappels. By activating your core and taking advantage of the ‘sit-down’ position I was talking about earlier, you can stay in a neutral position for thee length of the abseil.
If you add a lot of weight to your back, though, this position becomes a lot more difficult to maintain. There’s a chance that you may flip over, so that your legs are pointed skywards and your head is dangling towards the ground.
Why Is This Bad?
You might be wondering, is this dangerous? The short answer is yes. A position like this can be incredibly compromising to the safety of your rappel.
First of all, this makes it much harder to enact any sort of control with your brake hand. The rope is a lot harder to hold on to when you’re turned upside down, and you increase the odds of losing your grip and falling.
Even if this doesn’t happen, there’s still a lot of danger associated with flipping over on the rappel. Forget the fact that you might swing in to a cliff face and hurt yourself, or the damage that can be done to your equipment by putting strain on it that way. The real danger here is actually getting stuck; if you flip and you’re heavily weighed down by a backpack, it can be extremely difficult to return to a proper position.
This leads to a whole world of problems. In this instance, you essentially have three options:
- Sit there and wait for a rescue.
- Drop your bag (difficult to do while hanging upside down, and potentially damaging to what’s inside) so you can finish the rappel.
- Attempt to finish the rappel while upside down (not recommended!)
As you can see, this is clearly a situation that you want to avoid. The trick to doing so is preventing your bag from having too much influence on your centre of gravity.
How Heavy Is Too Heavy?
Being inverted might be cool when you’re dogfighting (Top Gun reference, anybody?), but it’s clearly not ideal when performing a rappel. The question now becomes: how heavy does your bag have to be before this is dangerous?
The answer varies from person to person, depending on:
- How much you weigh
- How your bag’s load is distributed
- How much experience you have rappelling
Terrain also plays a factor: if you’re able to brace your feet against a rock face, it’s easier to maintain a position than if you’re simply dangling in mid air.
Even with all of that considered, though, there isn’t that much margin for rappelling with a pack on. If you’re a seasoned vet and you know what you’re doing, you might be able to get away with wearing 20 pounds while descending.
I know that doesn’t sound like much, but try to put it in to context. My bag when I go on overnight hikes weighs thirty pounds, and anyone who’s ever backpacked before knows how heavy that feels. Twenty pounds is quit a lot to be rappelling with, even if all of the other conditions are in your favour.
Because of that, I wouldn’t recommend doing it with anything that weighs more than 10-12 pounds. In other words, you can fit your Nalgene, a spare sweater, and maybe some snacks or miscellaneous gear in your bag; anything other than that and it won’t be safe to rappel with.
So What’s the Alternative?
The alternative to wearing the bag on your back is to use what’s called a tandem rappel. A tandem rappel is when you dangle the bag between your legs, thus removing any concerns you may have about it throwing off your centre of gravity. This is the recommenced technique for any bag that’s heavier than the parameters set above.
Tandem rappels can be a little confusing. Here are some of the questions I encountered when doing research:
How Does It Work? You use a length of rope to attach the bag to your harness when performing the rappel, so that its weight is pulling directly down on your waist. This shifts your centre of gravity into a more desirable position.
Where Do You Attach The Bag? The bag can hang from your belay loop, a fully-reinforced haul loop, or even the rappel device itself. Hanging it from one of the side loops of your harness is not recommended; those loops may not be strong enough to support the weight, and it can make you lopsided.
How Do You attach The Bag? A sling or short piece of cordlette will work to attach the bag to your harness. Carabiners are best for attaching the back to the cordlette, as they’re easier to undo than knots. If you’re out of ‘biners, though, knots will work fine.
Is it Uncomfortable? Yes, rappelling in tandem can sometimes be uncomfortable (especially for men), as it tends to squeeze around the groin area. This can usually be mitigated by attaching the bag to the rappel device, not your own harness.
How To Tandem Rappel With a Backpack
Now that we know a little bit more about tandem rappelling, here’s a step-by step process for tandem rappelling with your backpack:
- Prepare for the rappel as you normally would, attaching your device, tying a backup knot, and performing safety checks.
- While still on flat ground, remove the backpack and place it by your feet.
- Clip (or tie) a sling to your harness or rappel device
- Take the other end of the sling and attach it to the backpack. Knowing where to attach it can vary from bag to bag, but I usually find the top loop is easiest (as long as it’s strong enough to support the bag’s weight).
- While keeping your brake hand on the rope, pick up the bag with your other hand.
- Walk backwards slowly in the direction of your rappel until your weight is on the rope.
- Once you’re in the air, slowly lower the bag down so that it’s hanging between your legs.
- Perform the rest of the rappel as you normally would, slowing down near the bottom so that your bag doesn’t impact the ground too hard.
- Untie your bag and clean the rappel.
So there we go! Rappelling with a backpack can be tricky, but when done properly it doesn’t need to make your rappel any more dangerous.
Related Questions
Can You Rock Climb In a Backpack? Rock climbing in a backpack is completely safe, and sometimes necessary. It can throw off your bodyweight and make certain moves more difficult, however, so it’s recommended you get some practice in before attempting it.
The post How To Rappel While Wearing a Backpack first appeared on Rappel World.
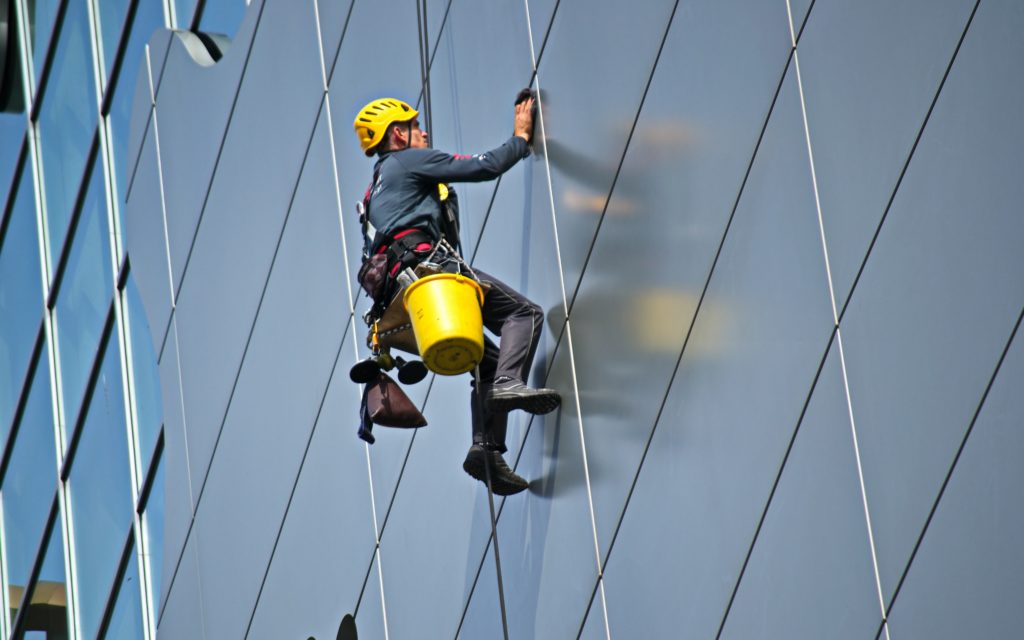
]]>The post What Does it Mean to Rappel a Building? first appeared on Rappel World.
]]>So, what does it mean to rappel a building? Rappelling a building is the act of lowering yourself down the side of a man-made structure, usually a skyscraper or something similarly tall.
The act of rappelling off of a building usually involves the use of some fairly specialized gear. To perform the rappel, you’ll use a harness to keep you secured, some type of device to let you control your descent (and usually a backup device, too), an anchor at the top of the building, and some reaaaaaaally long rope to help you reach the ground. Once strapped in, you will use the device to lower yourself down the rope, placing your feet on the building for control and controlling the speed of your descent until you get to the bottom.
While similar to other types of rappels, it does have some unique characteristics; I’ve completed a guide below to tell you everything you need to know about rappelling off of a building.
How Do You Rappel From a Building?

Contrary to climbing or nature rappels, which can usually be set up in a fairly short period of time, rappelling from a building takes a fair amount of planning and coordination.
First and foremost, there are bound to be some regulatory hurdles that need to be overcome. Think about it: as the owner of a skyscraper, would you want to let people dangle themselves into open air while attached to the top of your structure? The legal liability for that is insane. On top of that, some cities have regulations in place preventing people from rappelling without a proper permit.
That doesn’t mean, however, that it can’t be done. A lot of well-know international companies, like Johnson & Johnson or Hyatt, allow people to rappel from their buildings; it’s just a little bit more of a process to get all of the paperwork filled out.
Because of this, most building rappels are conducted through organizations who help to facilitate the event, in exchange for a fee. The organizations offer technical knowledge around how to perform the rappel, along with familiarity with all of the legal aspects. Many of them, such as Over The Edge, are non-profits with charity-driven goals.
Once you’ve cleared all of the red tape, there are a lot of safety considerations that need to be addressed. First and foremost is the anchoring point. If you’re going to be hanging your life off a length of rope, you want to make sure that whatever is connecting that rope to the building is rock-solid. Again, this is where the companies come in handy. Many of them have portable anchors that sit on top of the roof, using counterweights and pulley systems to ensure that you’re not going anywhere.
Once the anchor is set up, a rope is hung from it reaching all the way to the ground. This will be the rope that you use for your rappel. To perform said rappel, you’ll need to wear a harness to support your bodyweight and a device to control the rope.
Here, it’s important to be careful when selecting your gear. As opposed to climbing rappels, which often last less than thirty seconds, building rappels can be anywhere from ten to fifteen minutes long (more if you decide to hang out and enjoy the view). Because of this, you want to be sure that your harness is comfortable and that you have a locking rappel device in case your arms get tired.
Once you have all the gear, its time to rappel! Strap yourself in, place the rope through the belay device (and backup, if you have one), and get ready to have a fun time.
Most people report that the initial stages of the rappel are the hardest, when you’re first lowering yourself off the side of the building and gaining exposure to the height. For this portion, try to keep your breathing level and your hands steady. If it gets to be too much, look away from the drop below you, or even pause for a few seconds until your adrenaline goes down. Being nervous is normal!
Difference From a Climbing Rappel
As I mentioned above, there are a few differences between a climbing rappel and a building rappel. First and foremost is obviously the setting. Past that, however, there are some elements that are distinct enough they’re worth mentioning:
Height: As previously stated, a building rappel will usually be taller than a climbing rappel. Added on to this point is the fact that the rappel will consequently take you a much longer time to perform.
Gear: While the fundamental gear is the same, the individual selections you may chose are different. For example, most people who rappel from a building tend to use a full-body harness as opposed to simply a waist-and-legs type setup. It’s more comfortable over long periods of time, and it reduces the risk of you getting flipped over while rappelling.
Danger: Although they may seem scarier because of the additional exposure, building rappels actually tend to be incredibly safe. The anchor is uber solid, there’s no risk of rockfall from above, and you usually have a backup system for your rappel device just in case something does go wrong. Because of this, I would actually say that they’re far less risky than climbing rappels (as long as you do them properly).
Accessibility: Like I said, it’s far more difficult to set up an urban rappel than it is to just find a cliff somewhere and lower yourself down.
Apart from the differences, the basic rappelling technique used will be similar across both disciplines.
When Do People Rappel From Buildings?
There are two main instances where individuals would need to rappel from a building: charity causes and maintenance.
I touched on the charity point briefly above. Companies like Over The Edge use the thrill of rappelling as an opportunity to do some good. They’ll set up a rappel in high-visibility areas like New York or Chicago, and in exchange for the privilege of lowering yourself via their ropes, you have to raise a certain amount of money for a their cause. In exchange, Over The Edge takes care of all the regulatory and safety issues connected to the rappel.
I’m a big fan of this. Because of their size, complexity, and legal hurdles, building rappels aren’t something that the average person can just go out and do. Using a non-for profit to organize the event is a great way to have some fun and raise money for people who really need it.
The other instance where people rappel from buildings is for maintenance or similar purposes. Construction workers, window cleaners, and even engineers will dangle themselves from lines so that they can tend to buildings in a way that simply isn’t achievable via the inside. Obviously, this kind of rappel is far less accessible to the average. It’s also bound to be less fun, as the primary objective isn’t entertainment.
Related Questions
What building is best for rappelling? Personal preferences will vary, but you likely want a tall building (so you get lots of views) and one without too many architectural ‘features’. A smooth, constant wall will be easiest to lower yourself down.
Can I rappel off of any building? This question really comes down to can and allowed to. With the right gear, you technically could lower yourself down just about any building. Regulation wise, however, this isn’t doable.
The post What Does it Mean to Rappel a Building? first appeared on Rappel World.
]]>The post Best Rappel Device For Canyoneering (With Five Examples!) first appeared on Rappel World.
]]>According to my research, the best rappelling devices for canyoneering include:
- SQWUREL 2
- Canyonwerks CRITR 2
- Petzl PIRANA
- Sterling ATS Belay/Rappel Device
- Figure 8/ATC
Those are five strong candidates that will get you down any rappel that you need. As with anything, they each have their advantages and disadvantages, and a lot of the distinction between them is going to come down to personal preference. With that being said, however, I believe that the SQWUREL 2 is the best rappel device for canyoneering because of its innovative design and multiple levels of friction. The ‘tail’ feature on the device is a clever little addition that easily allows for more or less rope drag to be added, and the newly-improved nub allows for greater rope retention.
That’s not to say, however, that the SQWUREL is the right device for everyone. Depending on what you’re trying to get out of it, each device has its own advantages and disadvantages, which I go in to in more detail below. When all was said and done, this is what our research showed:
- Best All Around Canyoneering Device: The SQWUREL 2
- Runner Up: The Canyonwerks CRITR 2
- Best Budget Device / Most Bang For Your Buck: The Petzl PIRANA
- Best Device for Rappelling and Belaying: The Sterling ATS Rappel/Belay device
- Best for First Time / Infrequent Users: Black Diamond ATC or Figure 8
Below, I talk a little bit about why it’s useful to buy a device specifically for canyoneering, and then I go in to more detail about why I chose the devices that I did.
What is Canyoneering?
Before talking about what device to use, it’s important to understand what canyoneering is and what it entails. I talk about canyoneering a lot on this site, which makes sense because rappelling is such an important part of it.
Canyoneering is the act of travelling down a canyon using a variety of techniques like walking, scrambling, swimming, and rappelling. It can stretch from simple, two-hour trips that will only find you in water up to your knees, to full-day expeditions involving several technical sections and a lot of specialized gear.
Usually, you start at the top of a canyon, or somewhere where there’s an easy access point. You then follow the natural flow of the water down the canyon, splashing across pools, rappelling down cliffs, and generally testing yourself against the current of the water. Canyoneering is definitely a jack-of-all trades type sport; it requires strong swimming, and understanding of how rapids work, and solid climbing skills to see you through the more technical sections of the trip.
In terms of rappelling, canyoneering expeditions are where you’re going to find some of the most technical rappels out there. Waterfall rappels, over hanging rappels, tandem rappels, rappelling with a gear bag— you name it, and there’s a canyoneering trip where you’ll have to use it. Because of this, having the right gear for such a trip is essential.
Rappel Devices For Canyoneering
As I mentioned above, canyoneering is a great way to get out and have some fun in nature. It is, however, an inherently dangerous activity, and bringing the right kind of gear with you is paramount to ensure your safety. Because there are so many rappels involved in canyoneering, it makes sense to invest in a really solid device to help you increase your control on the rope.
Classic rappel devices, such as an ATC or a Figure 8, will work just fine (and we’ll get to them later). There are, however, some added complications to canyoneering that these all-around belay devices don’t handle as well as more specialized gear will.

The major benefit of the more specialized devices is that many of them allow you to adjust the amount of friction mid-rappel. This is extremely useful in canyoneering, when you often have to do technical, demanding rappels in varying circumstances. Want to add friction to your device to get over an overhanging lip? The Piranha, ATS, CRITR 2, and SQWUREL will let you do that. Want to loosen up the rappel once you’re hanging freely so that you can get to the bottom of your rope quicker? Again, those devices have you covered.
There’s also the issue of rappelling with a wet rope. Especially at the end of a long day, when your hands are sore and cold, controlling the rappel when your gear is soaked can take a lot more effort. Having a device that allows you to add friction makes life so much easier.
So, with that in mind, let’s take a look at some of the more specialized devices that will make your canyoneering trip all the better.
Best All Around Device: The SQWUREL 2
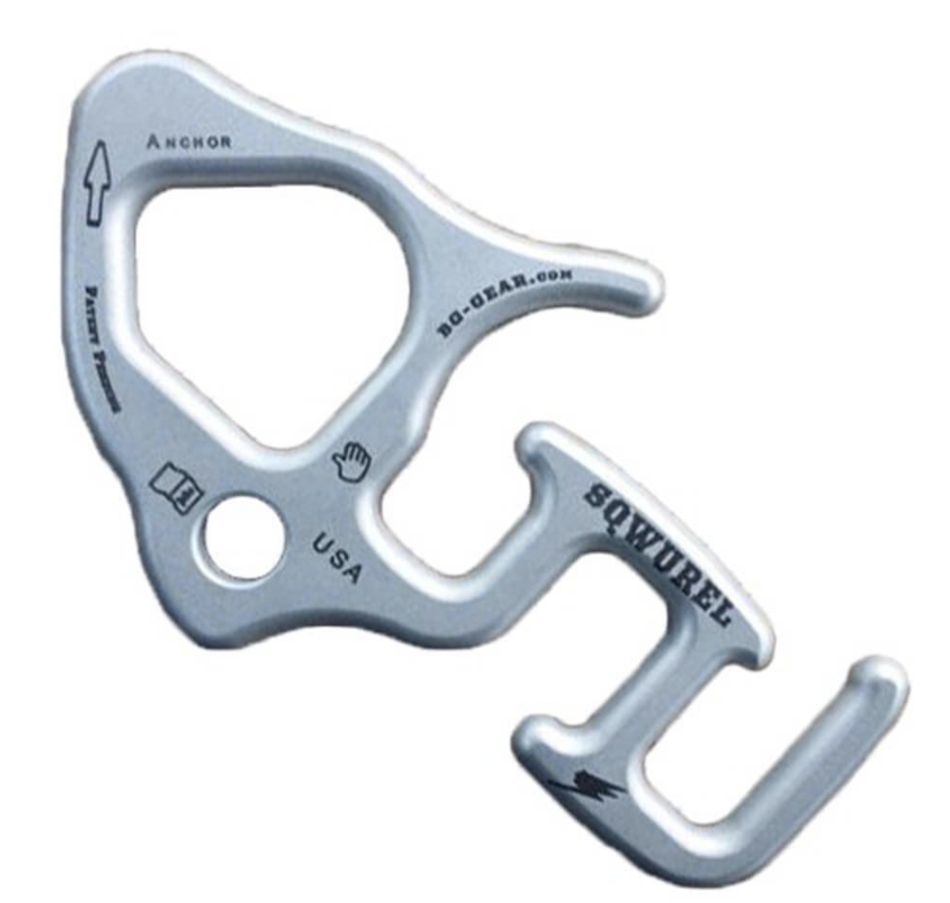
Price: $52.50 USD
You can buy it at: https://www.adventure.plus/shop/c/p/SQWUREL-2-x12765985.htm
Pros:
- Tail design allows for increasing/decreasing friction ‘on the fly’
- Improved rope retention nub allows for a shorter tail.
- Compact, narrow design reduces the chance of it catching on other pieces of equipment
Cons:
- More expensive than other devices
- Asymmetrical design can cause some difficulties for left-hand dominate canyoneers
Verdict:
This funky little device, named after its distinctive head and tail design, is the result of 3 years’ work and over 60 prototypes being built. The SQWUREL 2 is cleverly designed to allow for easy on-again, off-again adjustments to your friction levels via the ‘tail’ at the end, which allow you to simply slip the rope over it to add some stopping power to your belay.
The SQWUREL was built specifically for canyoneering, and it really shows. It’s not just the fact that it does everything the other devices do; it just does them better, and it requires less features to do so. In terms of rope control, no other device on this list can hold a candle to it. It’s got cleverly designed features, a streamlined look, and extra material in key friction areas. If used correctly, this device should last you well over 200 rappels— and that alone makes it worth the price tag.
The device isn’t perfect, however. The main flaw I could find through my research was that the SQWUREL’s asymmetric design made it harder to use for people who are left-hand dominant. In one instance, a fellow set it up incorrectly too many times and ended up prematurely wearing out his device.
Gear wear is never good, and if you start to notice a decline in the quality of your device you should definitely invest in a new one. When used correctly, however, the SQWUREL 2 has ever feature you could want in a canyoneering rappel device, and that makes it worthy of the #1 spot on this list.
Runner Up: The Canyonwerks CRITR 2
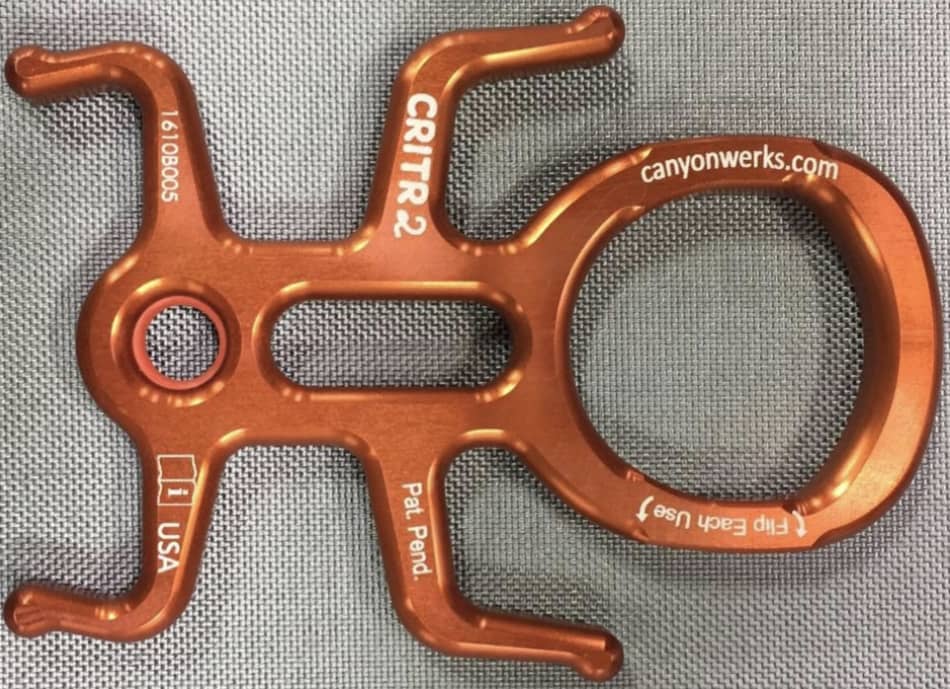
Price: $43.95
You can buy it at:https://www.adventure.plus/shop/Canyoneering/Technical-Hardware/Rappelling/p/Canyon-Werks-CRITR-2-Rappel-Device-x17404209.htm
Pros:
- Solid lock-off allows for resting mid-rappel
- Symmetrical design is simple, intuitive, and easy to use
- Wide, flat device reduces rope twist on the way down
Cons:
- Slightly more bulky than the SQWUREL
- Wider ropes may become jammed in the ‘legs’
Verdict:
Trying to chose between this device and the SQWUREL was a no win— or, I guess, a no lose— scenario. Both devices are awesome, with multiple friction levels, sturdy designs, and a slew of features designed specifically for canyoneering. The SQWUREL edged out the #1 spot because rappelling on it just feels so unbelievably smooth. That doesn’t mean, however, that the CRITR 2 isn’t a worthy device to get you down even the most technical of abseils.
Just looking at the device, you can tell that it’s built for dealing with technical terrain. Something about its design just screams sturdy to me. While it’s wide, flat body and protruding legs make it slightly more unwieldy than the SQWUREL, they also add a layer of longevity to the device. The CRITR is also reversible, so it allows for longer wear in sandy conditions. If you’re looking to save a few bucks, or if you just prefer the simplicity and sturdiness of the design over that of the SQWUREL, you can’t go wrong with the CRITR.
Best Bang For Your Buck: The Petzl PIRANA
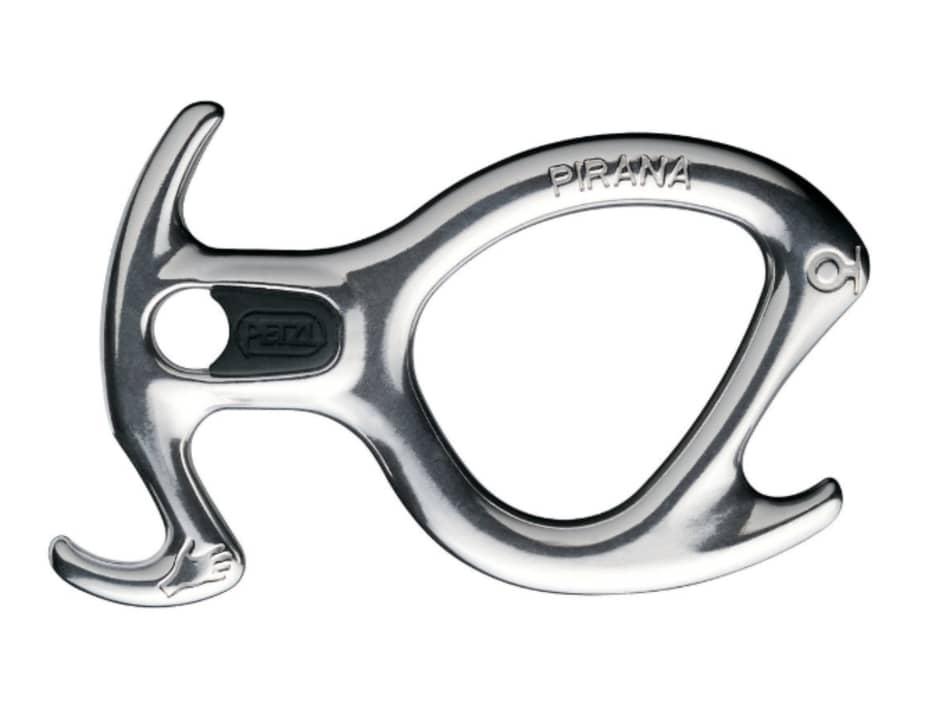
Price: $39.95
Where to Buy: https://www.petzl.com/US/en/Sport/Belay-devices-and-descenders/PIRANA
Pros:
- Affordable price from a trusted manufacturer
- Smooth design allows for the PIRANA to be attached to the rope without needing to disconnect from your harness.
- Variable friction levels provide adequate adjustability pre-rappel
Cons:
- Fewer features than other devices
- Fewer friction levels can be added mid-rappel.
Verdict:
For those looking to save a little bit of money and still get some pretty decent functionality out of it, the Petzl PIRANA is a go-to rappelling device that was designed specifically with canyoneering in mind. Admittedly, it doesn’t have all of the features that the above two devices do, but it’s still got a lot going for it, and for 90% of people it’ll function just fine as a canyoneering device.
The main advantage in the PIRANA is that it allows you to set up your rappel without ever having to remove the device from your harness. This means there’s less chance of dropping it with your cold, water-clogged fingers once you’re five hours in to a canyoneering trip. Additionally, the PIRANA has three different friction levels that can be set before the rappel, and another two levels of variation you can adjust once the rope is weighted.
Six varying friction levels might not give you the same level of customization as the SQWUREL or the CRITR, but it’s nothing to scoff at either. The PIRANA also has a wide, flat design that reduces rope twist. While it may not be as technical of a device, it’s still designed by a world-class gear manufacturer with rappelling in mind, and that earns it a spot on the list.
Best Device For Belay/Rappel Combos: The Sterling ATS

Price: $39.95
Where to Buy: https://www.amazon.com/Sterling-Rope-Device-Black-8-Inch/dp/B004MXCPRW/ref=cm_cr_arp_d_product_top?ie=UTF8
Pros:
- Two-slot design allows for easy double-rope rappelling
- Middle slot also allows the device to be used for belays
- Four horns give varying friction levels mid-rappel
Cons
- Smaller carabiner hole only fits specialized equipment.
- Generalist design lacks some of the features of the above devices
- Soft metal wears quickly when faced with sand and water
The Sterling ATS is an all-around rappel/belay device that combines a traditional tube design with the features of the CRITR and other canyoneering devices. While the ATS is a solid device that can take you from the canyons of Utah to the alpine meadows of Colorado, it lacks some of the down-to-earth functionality that the more specialized devices boast.
The ATS allows you to belay and rappel, and it will do both of those things perfectly fine— but it isn’t particularly great at either one of them. As a belay device, it’s a little too big and bulky to excuse bringing it on fast-and-light alpine expeditions. As a canyoneering device, it lacks the control and specialized ability that the CRITR and SQWUREL do. Sure, the four horns work fine, and the concave/convex nature allow you to adjust for friction pre-rappel, but we found that the ATS didn’t quite have the same amount of control as the other three did when doing more technical rappels.
That being said, it’s still an awesome device, and for most people going in to a canyon, it’ll serve you just fine. If you’re also a fan of climbing and you want to get some days in at the crag, the ATS will allow you to do so without needing to go out a purchase another device. It also does have the advantage of offering easy-to-perform two rope rappels, which is never a bad thing in my books. These features, however, just aren’t quite enough to outweigh its disadvantages.
Easiest to Use / Best for First-Time Canyoneers: The Black Diamond ATC and Figure 8
Price: $25.95/15.95
Where to buy: https://www.blackdiamondequipment.com/en_CA/search?cgid=belay-rappel
Pros:
- Simple, easy to use, intuitive design
- Familiar to many climbers
- Rugged, all around devices
Cons:
- No adjustability mid-rappel
- Higher chance of rope twist
- Less control
Anyone who reads my blog knows that I absolutely love the Black Diamond ATC. It is, in my opinion, the best rappel device on the market: it’s small, it’s easy to use, you can use it with one or two ropes, it’s rugged as hell… the list goes on and how. However, despite how much I love the thing, even I’m inclined to admit that, in terms of canyoneering devices, it’s far from the best device on the market.
To start, it doesn’t allow you to adjust your friction mid rappel. In fact, it doesn’t really allow you to adjust your friction at all. You cant try, using a carabiner-prussik set up, but doings so takes up time that could otherwise be spent canyoneering. Additionally, the ATC (and the classic figure 8) just don’t have the same range of features as the above devices.
That being said, for most people embarking on a canyoneering trip, these two devices will work perfectly fine, especially if you’re doing something that’s not too technical. Almost every climber I know has an ATC or a Figure 8 somewhere in their gear shed. If you want to head out to the canyons for a day and don’t want to have to invest in an entirely new device, your ATC/Figure 8 will serve you just fine.
Conclusion
So there we go! Out of the above list, there’s really no way to go wrong in terms of what device you chose to buy. All of them are incredibly well designed and backed by trusted manufacturers who know what they’re doing.
Still, canyoneering is a tricky sport, so make sure you do your research and buy the device that feels right for you. Don’t take my word for it, either; go out to your local MEC or REI and try these devices for yourself. Practice a couple of rappels in controlled conditions, seeing how you like the different features of each device, and really get a feel for them before you make a buying decision. On top of that, remember to always be safe out there, and don’t go on a trip until you’ve got the proper skills and planning to get home safely!
Related Questions
Where Can I Buy A Steel Rappel Device? Steel devices are great because they’re virtually impossible to wear down. While they might not have the same lightweight advantages that other metals do, they’ll last you for a lifetime and you won’t have to worry about them wearing in. The ProClimbing Big 8 is a stainless steel rappel device available on Amazon that actually has a lot of canyoneering-friendly features!
What’s the Best Rappel Device? The title for best rappel device is a hotly contested one. As I’ve said in the article, my personal favourite is the Black Diamond ATC. Not everyone agrees with me, however, and there’s lots of other choices out there that will serve you just as well. I’m working on a complete guide to finding thee best rappel device as we speak, so stay tuned!
The post Best Rappel Device For Canyoneering (With Five Examples!) first appeared on Rappel World.
]]>The post Rappelling vs Abseiling – What’s the Difference? first appeared on Rappel World.
]]>So what’s the difference between rappelling and abseiling? Rappelling and abseiling are the same thing; both activities involve lowering yourself in a controlled descent via a piece of rope. The main difference between the two terms involves their usage and history.
Rappelling and abseiling both mean to use a piece of rope or cord, combined with some kind of control device, to lower yourself down. Anyone experience in the lingo of climbing will recognize both terms for what they mean. Rappelling is the term most often heard in North American, whereas abseiling is commonplace in the UK and other European countries. I was curious about the origins of the words and why they’re different, so I did some searching on the history of climbing and summarized what I found below.
Geographical Differences
As I said above, the only real difference between the two words are their varying popularity in different parts of the world.
In the US and Canada, the term rappelling is used almost exclusively, although any experienced climber will recognize the word abseiling for what it is. In the UK and Europe— specifically Germany— abseiling is the go-to when describing someone lowering themselves via a piece of rope.
In other places, however, the distinction becomes less apparent. In Australia, New Zealand, and France, for example, the two are used almost almost interchangeably. Most English written climbing books use the term rappelling, but a fair chunk of them still use abseiling.
All in all, don’t stress too much about which version of the word you’re going to use. The important part is that you know what you’re doing; as long as you’ve got proper form, no one will care too much about what you decide to call it.
Linguistic Heritage
Both words have European heritage, which makes sense because that’s where mountain climbing was first practices. To abseil originally comes from the German word abseilen, which literally means ‘to lower on a rope’. The term was likely used during the early days of mountaineering, which experienced its birth in Europe during the 1800’s.
Rappel, as stated above, is a French word. Curiously, rappel doesn’t have the same literal definition as its German counterpart. Instead (according to Google translate), to rappel means to recall or withdraw. I would guess that rappelling was then used to describe the act of lowering ones self off of a mountain, which could be seen as ‘withdrawing’ yourself from a climb.
The definitions, however, don’t help to explain why one word is more common that another depending on what area of the world you’re in. To find out why this happened, I’ve written a brief history on mountain climbing below, along with my hypothesis as to why the two words exist.
Mountaineering: Where it all Started

The act of ascending a mountain or cliff face didn’t really exist in ancient times. Mountains were viewed as dangerous, sometimes sacred places, who’s summits often went untouched for thousands of years. Many cultures, such as the Greeks, believed that the tops of mountains belonged to gods or other heavenly beings. Consequently, those living in these societies steered well clear of those summits.
That started to change around the 1500’s, when the enlightenment took over Europe and secularity started to become more common in society. In 1786, two climbers names Jacques Balmat and Michel-Gabriel Pacard made the first ascent of Mount Blanc (the highest mountain in the Alps). To this day, this stands as perhaps the most important moment in mountain climbing history.
Over the next two hundred years, mountain climbing— sometimes called mountaineering or alpinism— took off in Europe. Famous mountains like The Eiger and The Matterhorn were summited, government grants were given, and Alpinism societies started to keep formal registered of which peaks were being climbed. The fervour spread outwards, towards distant ranges such as the Himalayas and the Andes.
It was in this heyday of mountaineering that rappelling was first invented. The first person ever credited with the act of abseiling— as far as I could find— was Jean Charlet-Straton, a Chamonix mountain guide who lived from 1840-1925. In the late 1870’s, Charlet-Straton made several attempts at the un-summited peak of Petit Dru, finally reaching the top in 1879. It was on these expeditions that Charlet-Straton perfected the technique of lowering himself via rope, a skill that would soon become commonplace amongst alpinists.
It would make sense to me that in this early period, the word abseiling was used as a literal definition of what Charlet-Straton was doing. In fact, until 1944, there was no recorded use of the word ‘rappel’ to describe anything mountaineering related. Roger Frischon-Roche was the allegedly the first person to describe what Charlet-Straton invented as ‘rappelling’, although I’ll admit that my source for this is not the most reliable.
So when did the word rappelling gain popularity? Why was it used at all, when abseiling was such a literal definition? To know that, we first have to take a look at what was going on across the Atlantic ocean when mountaineering was taking off in Europe.
Climbing in America: A Cultural Revolution

While mountaineering continued to flourish in Europe, reaching its peak in 1953 when Sir Edmund Hillary summited Mount Everest, climbing in America took a very different route.
Born out of a cultural rebellion and a tiny campsite in Yosemite Valley, the act of rock climbing— scaling sheer vertical walls through the use of one’s fingertips and toes— wold soon take over the country. Pioneered by legends like Royal Robbins, Warren Harding, and Jim Bridwell, climbing existed on the fringes of society for many years before finally gaining mainstream attraction in the ’80’s.
Rock climbing, in its early days, lacked much of the prestige that mountaineering did. While top mountaineers received government funding, long expeditions, and social recognition, climbing was viewed as a fringe activity. Because of this, the sport took on a rebellious nature; climbers rejected the posh and pomp that they viewed as surrounding European Alpinism, choosing instead to create their own sport— and a whole new language to go along with it. Cracking, stemming, free climbing, beta, dyno… the list of climbing terms goes on and on.
The Divide
There’s no hard proof of this, but I would venture to guess that this cultural rift is what caused language differences between the two parties. Many mountaineers viewed rock climbing as more of a hobby, and one that should be approached with the utmost discipline. They looked down on many hardcore rock climbers, who used the sport as an adrenaline-filled nature. In response, many climbers viewed mountaineers as pretentious and stuck-up.
It would make sense to me that this is where the two terms would start to differ. Climbers in America were forced to rappel constantly, lowering themselves from the massive cliff walls of Yosemite Valley and other historic climbing locations. Mountaineers use rappelling less often, but it is still an important part of an alpinists’ skillset.
I would put forth the theory that the confusion between rappelling and abseiling is mostly down the geographical distances and cultural divide. With two distinct activities being practiced in different parts of the world, and with such a cultural difference existing, it makes sense for different terminology to emerge. As part of their rejection of mountaineering and its pompous attitude, climbers forfeited the language of abseiling, choosing instead to use the much more recently coined ‘rappel’ to describe what they were doing.
So there you have it! There was a lot of research involved, and I had to make a few assumptions along the way, but that’s my conclusion as to why some parts of the world use abseiling, while others use rappelling. As I said above, your choice of terminology really comes down to personal preference.
Related Questions
What is military rappelling? Military rappelling, sometimes referred to as Australian rappelling, is a rappel where you lower yourself face-first, using a belay device clipped to the back of your harness. It allows the person rappelling to more easily see the ground beneath them.
The post Rappelling vs Abseiling – What’s the Difference? first appeared on Rappel World.
]]>The post Video Product Review Example first appeared on Rappel World.
]]>Quisque quis tincidunt nisi, ut faucibus dui. Vivamus feugiat ut erat quis eleifend. Fusce elit magna, auctor ut lacus sed, interdum maximus nunc. Sed nec urna nibh. Duis suscipit metus a mollis dictum. Donec iaculis mollis ipsum, ut laoreet odio auctor nec. Donec pellentesque sapien enim, vel sollicitudin arcu lacinia quis. Interdum et malesuada fames ac ante ipsum primis in faucibus. Nunc ullamcorper finibus lorem ut tristique. Aenean id euismod magna. Nunc auctor quam eget nunc blandit egestas ac ut ex. Aliquam mollis ante viverra augue posuere dictum eget vitae nisi. Donec non vestibulum diam.
Vestibulum faucibus dolor leo, id tristique libero aliquam vel. Pellentesque consectetur euismod laoreet. Nullam interdum nisl varius vestibulum volutpat. Phasellus finibus lobortis sapien eget tincidunt. Phasellus rutrum enim ac auctor fringilla. Pellentesque accumsan urna id cursus cursus. Duis lobortis vel eros interdum faucibus. Nullam sed aliquet lacus, id eleifend eros. Donec imperdiet mi mattis aliquam dapibus. Nunc vitae vestibulum libero. Orci varius natoque penatibus et magnis dis parturient montes, nascetur ridiculus mus. Nunc magna ex, semper mollis metus vel, scelerisque auctor augue. Morbi dolor sapien, luctus at nibh eget, tincidunt aliquam metus. Fusce laoreet arcu at ipsum lobortis, sit amet fermentum risus venenatis.
The post Video Product Review Example first appeared on Rappel World.
]]>The post Rappelling With A Dynamic Rope: The Complete Guide first appeared on Rappel World.
]]>So, can you rappel with a dynamic rope? Yes. Dynamic ropes work perfectly well for rappelling, and in certain situations they may actually be favourable to a static rope. Dynamic ropes are built to flex and stretch when put under stress; this makes them ideal if you’re going to be using them for any kind of activity involving lots of movement.
Ice climbing, rock climbing, and alpinism are common activities that would require a dynamic rope. In these situations, it’s perfectly acceptable— and completely safe— to rappel with a dynamic rope. However, there are certain situations in which a static rope may be preferable. Factors such as the presence of water, the wear on the gear, and what activity you’re doing should be considered when deciding between a static and dynamic rope.
Static vs Dynamic Ropes
The distinction between static and dynamic ropes is one of the most important to learn before you engage in any rappelling or climbing-related activity. Though they may look the same to the naked eye, bringing the proper rope along with you can be the deciding factor between life and death in the mountains.
The difference between a dynamic and a static rope lies in the material that makes up the inner core of the rope. All climbing ropes have two components: the sheath and the core. The sheath is the braided outer layer that protects the core from wear and tear. It’s made up of tightly woven nylon fibres and is often brightly coloured. The core, on the other hand, is what gives the rope its tensile strength; it’s made up of interwoven polymer fibres that gives a rope the ability to bear weight.
In dynamic ropes, these polymer fibres are woven together in such a way that they stretch when they become load bearing. This allows the rope to lengthen under tension, softening the impact when force is applied. In climbing terms, this means that when you fall, the rope can stretch out in an elastic fashion, bringing you to a stop in a more gradual fashion. It’s what allows climbers to take fifty-foot falls and remain okay.
Static ropes have none of this stretching ability. Because the fibres don’t have the ability to stretch, when load is placed on a static rope, it simply goes taunt. Think about what this means in terms of climbing. If you take a big fall on a rope that doesn’t stretch, one of two things are going to happen: either you could put too much force on the rope, causing it to break, or you will come to an extremely abrupt stop. This sort of sudden impact can cause severe whiplash and other nasty spinal injuries.
Knowing whether your rope is static or dynamic is absolutely essential before you head out to go climbing. Static ropes are good for hauling gear and jumaring up routes, but they should never be used to protect a fall.
When To Use A Dynamic Rope
Now that we know the difference between a static and dynamic rope, let’s come back to thee original question. As you can see, there are certain situations in which you may have to use a dynamic rope. Say you’re going on a climbing expedition and you only have enough space to bring one rope with you. There’s no way to hike off the top of your climbing route, so you’re going have to rappel down. In this instance, it’s not just acceptable to bring a dynamic rope with you, it’s actually required. You’ll need the dynamic rope to climb with, and it will be all you have on the rappel down.
That being said, even when it’s not essential, there’s nothing wrong with using a dynamic rope to go rappelling, even if you don’t expect to take a fall on it. Dynamic ropes function perfectly well for rappels. There are, however, some things you want to take in to consideration before using your dynamic rope to rappel:
Cost
The attention and craftsmanship that goes in to making a dynamic rope far exceeds that of a static line. Because of that, dynamic ropes are more expensive than their static counterparts. Static ropes can be bought for about $2.50 per meter, whereas dynamic ropes are always going to be in the $3.50 and up range. Considering you will need tens of meters of rope, and that ropes are a piece of equipment that often need to be replaced, this price difference can start to add up.
While dynamic ropes are handy to have, they’re not always necessary. If all you plan to do is rappel or go caving, you may as well save yourself some money and just buy a static rope.
Wear and Tear
When rappelling, you’re going to be using a device that creates friction against the rope to slow you down and give you control. Some devices, like the Figure 8, do this by twisting the rope in opposing directions several times. Others, like a Black Diamond ATC or a Petzl Ascender, use small metallic ‘teeth’ that bite in to the rope to slow it down.
These teeth are perfectly safe to use, and can actually make the rappel easier to control. They do, however, increase the rate of wear and tear on your rope. As I stated above, this becomes more of an issue when you’re buying costly dynamic ropes. If you’re going out for the day and you’re certain that no climbing will be involved, it’s probably best to just stick with the static rope.
Presence of Water
When dynamic ropes become wet, they lose their strength under tensions and become unsafe to climb on. However, contrary to what some people may have told you, dynamic ropes can be used for rappelling even if they’re wet. As long as there’s no sudden impact being placed on the rope, it’s perfectly safe to use no matter how much water it’s absorbed.
That doesn’t, however, mean that you should go around trying to dunk your dynamic rope in water. Getting the rope wet can cause rotting at the core, which is detrimental to the lifespan of the rope. Bringing it back to the cost factor listed above, it may be best to leave the dynamic rope at home if you think you’re going somewhere wet.
Rappelling With Both
This is a question I see a lot of around the internet: can you combine a static and dynamic rope for a rappel? The answer is yes, but you need to be sure you know what you’re doing. Different stretch rates in the two ropes can cause inequalities in rappel length and endanger your rappel. If you’re going to use both a static and dynamic rope to rappel, make sure you follow the proper steps to avoid an accident. This article is a great resource for rappelling with one of each kind of rope.
So there you have it! Rappelling with a dynamic rope is not only possible, but is in fact highly encouraged in some situations. Dynamic ropes are safe, strong, and perfectly acceptable to rappel on, even though they may not be completely necessary in every situation.
Related Questions
How can you tell if a rope is static or dynamic? Manufacturers will attach a tag to the rope to tell you if it’s static or dynamic. If the tag has gone missing, it’s best to just assume the rope is static. Please don’t try to test the rope to see if it will flex; it takes quite a bit of force to stretch a dynamic rope, and the line between experimentation and injury can get quite blurry.
What Rope Should I Use For Rappelling? The proper rappelling rope depends on the situation you’re going to find yourself in. In this article, I go in to greater detail about what rope is best suited for what situation.
The post Rappelling With A Dynamic Rope: The Complete Guide first appeared on Rappel World.
]]>